
Full Video
Amazon has recently begun cracking down on product listings that use invalid or non-GS1 certified barcodes. GS1 GS1 Barcode refers to the Global Standards One organization that issues and manages Universal Product Codes (UPCs) and barcodes worldwide. If your Amazon listings are using barcodes purchased from third-party sellers rather than directly through GS1, you may soon find your listings removed or suspended.
Having legitimate GS1 barcodes for your products on Amazon has become extremely important. Listings with improper barcodes are at high risk of being taken down during this ongoing crackdown. As an Amazon seller, you should take steps now to change over any non-certified barcodes to valid GS1 UPC codes. Doing this will help avoid having your listings removed and protect your Amazon account status.
The process involves creating a duplicate listing with a new GS1 barcode, and requesting Amazon’s catalog team to merge the old and new listings while retaining both barcodes. This may take some persistence and multiple requests to Amazon, but it can successfully update your listing UPC without disruption.
This article will walk you through the necessary steps to change your Amazon product barcodes from invalid non-GS1 Barcode to proper GS1 certified codes. Following this guide will help you avoid suspensions and keep your product listings active during Amazon’s barcode crackdown.
1. Download your inventory report
The first and most crucial step is to download your full inventory report from Amazon Seller Central. This will allow you to edit and modify your listings locally before uploading the changes.
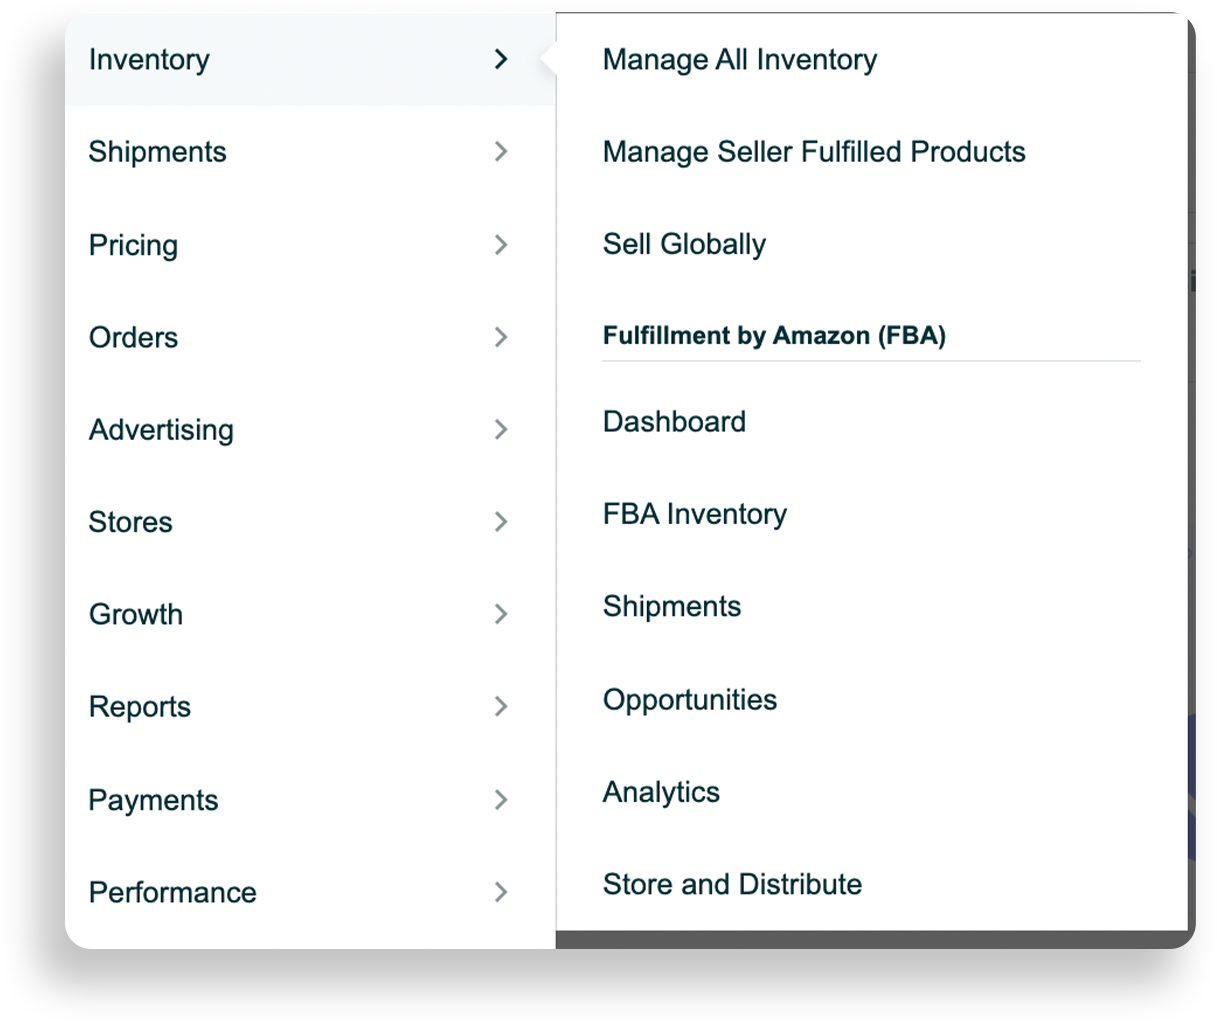
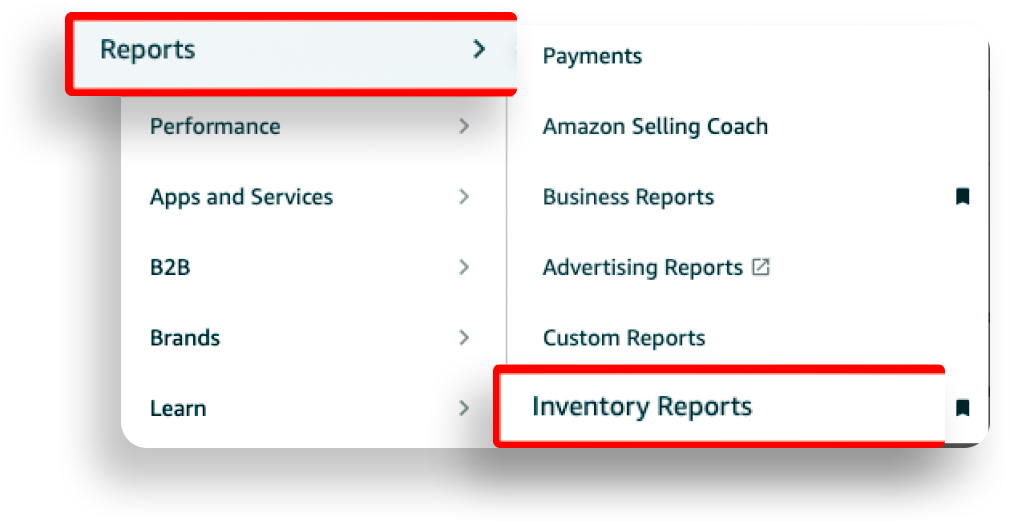
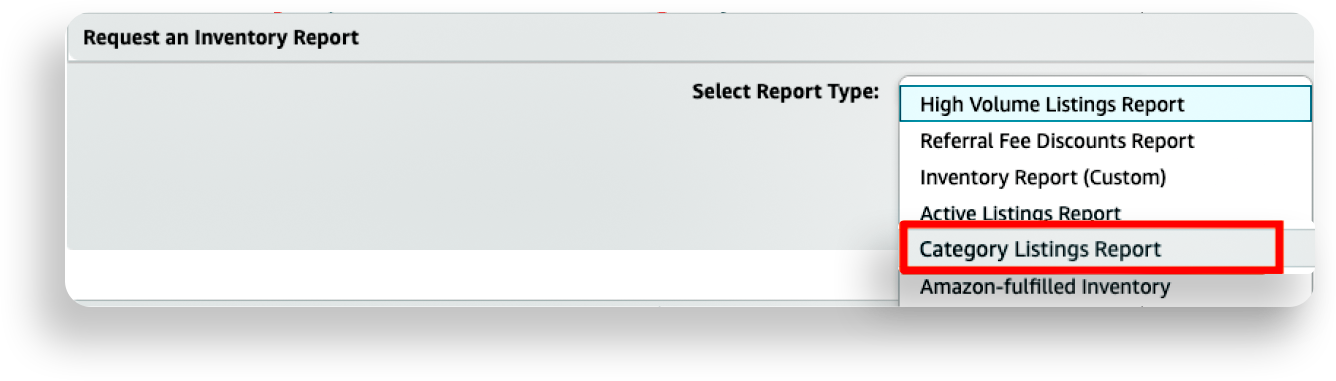
To download your inventory report, log into Seller Central and hover over the “Inventory” tab near the top. Select “Inventory Reports”, then click on “Category Listing Report”. This will pull up all of your active product listings.
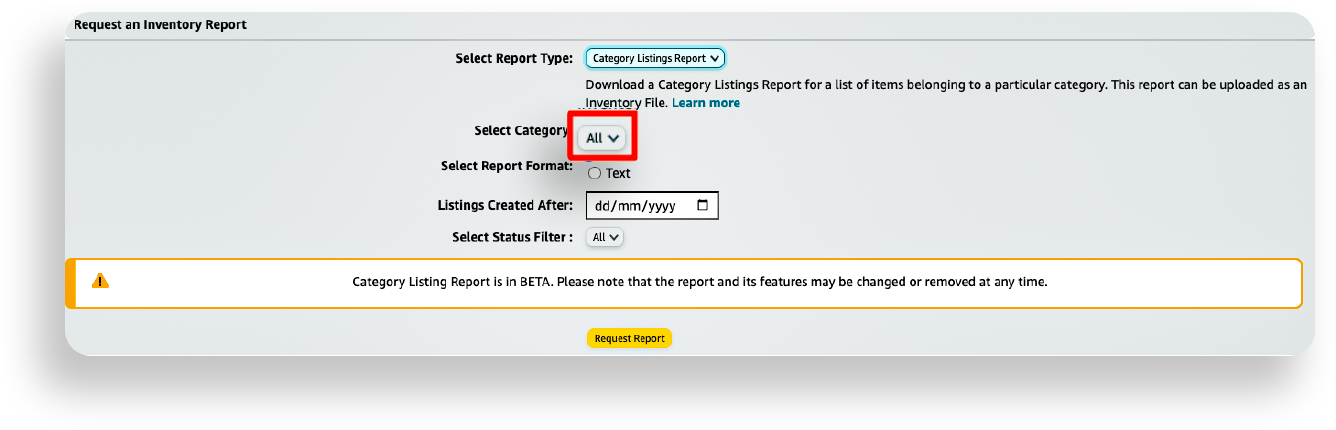
Make sure to select the “All” version of the report so you can download your entire product catalog. The Category Listing Report may take a few minutes to generate with all of your listings included. Once ready, click “Download” to save the Excel file to your computer.
Open the Category Listing Report in Excel. Now you need to isolate just the one listing that you want to modify the barcode for. The easiest way is to use the filter function. Click on the filter icon at the top of one of the columns, like SKU. Then filter for the exact SKU of the product you need to edit.
This will hide all other rows, leaving only the one listing visible. You can also delete the hidden rows to really isolate just that single product. The goal is to have a file with only the target listing showing.
Now you can edit all of the necessary fields on this listing, including entering the new GS1 barcode. Make sure to change the SKU to a completely new value, and update the UPC field with the proper GS1 Barcode. Select “UPC” for the Product ID Type.
Once your listing is updated, delete any other hidden rows and save your edited report. This file with the revised listing is ready to be uploaded back to Amazon.
As an example, you may filter for only your SKU ABC-123, change the SKU to XYZ-789, enter your new 12-digit GS1 barcode, and set Product ID Type to UPC. This edited report is now ready to create a new listing with the valid GS1 UPC.
2. Create new listing with GS1 barcode
After you have isolated and edited the listing to add the new GS1 barcode, the next step is to actually upload this updated inventory report back into Amazon. This will create an entirely new listing with the revised details and valid UPC.
Go back to Seller Central and hover over the “Inventory” tab again. But this time, click on “Add Products via Upload“. This will open the product upload wizard.
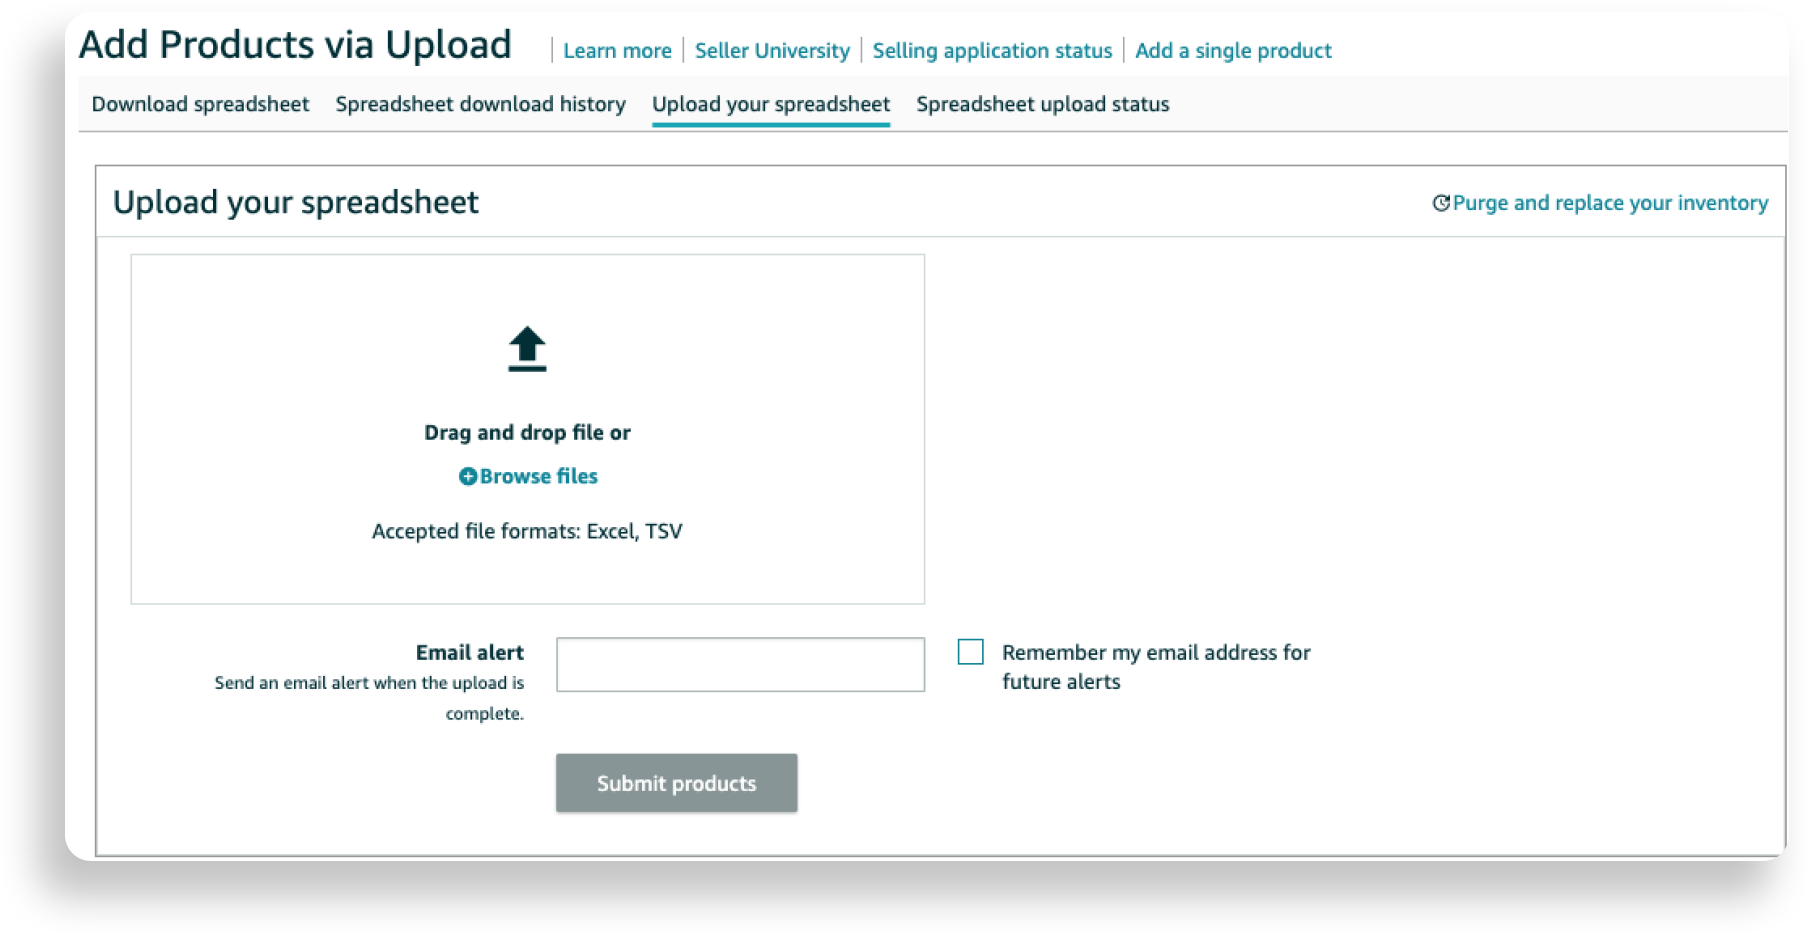
Select “Update existing listings” as we want to upload our edited report. Click “Choose file” and select the inventory report you exported and revised in the previous step.
Double check that you are uploading the correct file with only the targeted listing showing. Once verified, click “Upload”.
Amazon will now process the file and create a new product page based on the details in your updated report. Pay close attention to any errors that may appear. Oftentimes there will be some corrections needed.
Read each error carefully to determine the issue. Common problems include missing required fields, incorrect values, or improperly formatted UPC codes. You will need to fix each error in your listings file before Amazon accepts the changes.
For example, you may see an error like “Invalid value for ‘BulletPoint1′” indicating you forgot to add bullet points in the edited listing. Or another error like “UPC code is not in proper format”. Go back to the Excel file, make the corrections, and upload again.
Keep iterating and uploading the fixed report after every error until the file processes successfully without any mistakes. This may take a few rounds of uploads and edits to resolve all issues. But eventually your revised listing will be created in Amazon with the new GS1 barcode included.
At this point you have a new product page live, but it does not have any of the reviews, ratings, or history of the original listing. So the next step is critical to transfer over all of that seller performance data.
3. Request catalog team to merge listings
Now that you have a new listing created with your GS1 barcode, you need to get this merged back into the original listing while retaining both UPC codes. This will transfer all of your reviews, ratings, and sales history to the new listing with the proper barcode.
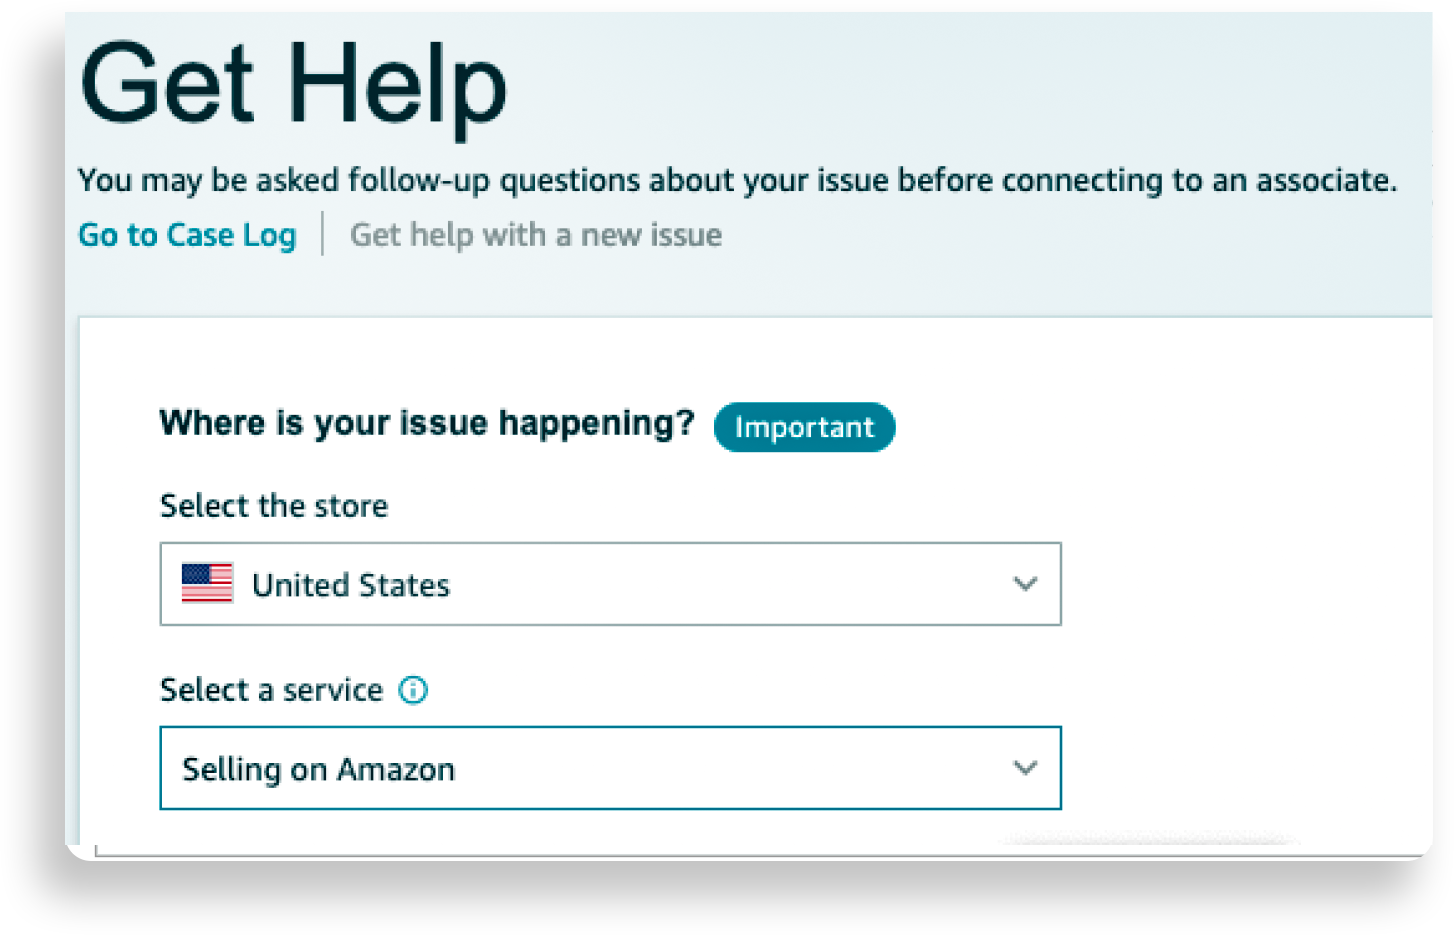
To do this, you must open a case with Amazon Seller Support and request escalation to the Catalog Team. Explain that you need to merge two listings where all details are identical, except one listing contains an additional UPC barcode.
Emphasize that the products are exactly the same, with matching SKUs, titles, descriptions, etc. The only difference is you want to add the extra GS1 barcode to the original listing by merging the two pages together.
Getting your case escalated is critical, as regular support agents do not have access to merge listings in this special way. You may need to try opening cases repeatedly and requesting escalation until you get elevated to the Catalog Team.
Once connected with the Catalog Team, reiterate you want to merge the listings while retaining both UPC codes. Keep all other information the same as the original listing. Ask them to only add the extra barcode from the new listing you created.
The Catalog Team may push back that the SKUs or UPCs being different prevents merging. But politely insist the products are identical and having two barcodes is valid in this situation. You may need to be persistent and re-explain a few times.
For example, tell them “Please merge Listing A into Listing B while keeping UPC #12345678 from Listing A and UPC #87654321 from Listing B. All other details should remain the same as Listing B.”
With perseverance, the Catalog Team should be able to accommodate this request and combine the listings with both barcodes included. This prevents you losing any historical data while adding the required GS1 code.
Once merged, verify in Seller Central that your original listing now contains both your old UPC and new GS1 barcode. If not, keep working with the Catalog Team until both are showing. At that point your listing is fully updated with a valid GS1 UPC!
4. Confirm merged listing contains both UPCs
The last step is to confirm that your listing merge was successful, and that the original listing now contains both your old non-GS1 barcode as well as the new GS1 compliant barcode.
Once the Catalog Team has attempted the merge, you may not see the changes immediately. Wait a few hours and then double check your original listing in Seller Central to verify both UPCs are now present.
Specifically look to validate:
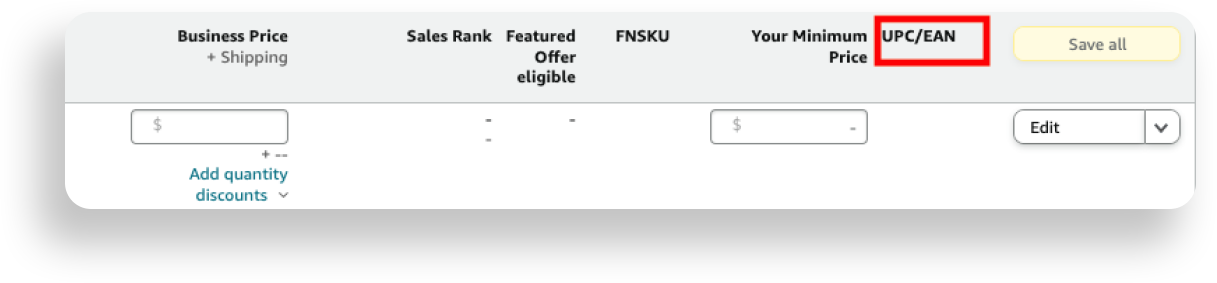
- The GS1 barcode you recently added is now displayed under the original non-GS1 barcode in the listing.
- When you edit the listing, there are two UPC fields showing both the original invalid UPC and the new valid GS1 code.
- All of your product data like title, description, images, pricing carried over from the original listing.
- Most importantly, your reviews, ratings, and full sales history are still intact on this merged listing.
- If for any reason you do not see both barcodes on your listing after the merge:
- Reach back out to the Catalog Team immediately via a new case.
- Explain politely that it appears the merge did not properly retain both UPCs.
- Request they investigate and complete the merge again keeping both barcodes.
With persistence, Amazon should be able to fully merge your listings with the dual UPCs. However, it make take a few tries and following up with additional cases to get it corrected properly.
Once you definitely see both your non compliant and GS1 barcodes coexisting on your listing, then you can rest assured your products now comply with Amazon’s UPC requirements. Your listings are safeguarded during the barcode crackdown with this simple merging process.
Wrapping Up
Switching your Amazon product listings to use GS1 certified barcodes is crucial to avoid suspensions and removals during Amazon’s ongoing UPC crackdown. Following the steps outlined in this guide will walk you through the entire process to safely update your barcodes.
While it may take some persistence working with Amazon support, the process of creating a new listing and merging with the catalog team will enable you to maintain both your old barcode and new GS1 Barcode. This spares you from losing important historical data.
In the end, you will have listings fortified with legitimate GS1 barcodes, avoiding the risk of a damaging suspension. Your product pages will be stronger and healthier than ever.
The effort to properly update to GS1 barcodes is well worth it to keep your account and listings active on Amazon. Avoid waiting until your listings are already removed to take action. Be proactive now in transitioning to validated UPC codes.
Your sales and reviews are too important to put at risk over invalid barcodes. Follow this guide as soon as possible, and breathe easier knowing your listings meet Amazon’s requirements or You can consult with our team. The small time investment will pay dividends in peace of mind and continued ecommerce success.
The cost of GS1 barcodes can vary based on the number of barcodes you need and the level of membership you choose. Generally the initial fee can range from $259 to $750 plus an annual renewal fee that typically costs between $50 and $150. Pricing may also vary depending on your location and the number of barcodes required.
Selling on Amazon without barcode is possible but not always straightforward. Amazon generally required barcodes (UPC, EAN, or ISBN) for most products. However, you can apply for an exemption if you’re selling handmade, custom, or exclusive products. For some categories, Amazon may allow you to list producers with a GTIN exemption, but this often requires approval and documentation.
GS1 barcodes are generally recommended for selling on Amazon as they provide a standardized and internationally recognized way to identify products. While Amazon accepts barcodes from other sources, GS1 barcodes ensure that your product codes are unique and compliant with global standards, reducing the risk of conflicts and issues with your listings.
Changing the UPC can affect your product listing in several ways. If you update the UPC, Amazon treats it as a new product, which may result in the loss of existing reviews and sales history associated with the old UPC. Additionally, you’ll need to update the new UPC in all relevant systems and ensure that your inventory is correctly linked to the new code to avoid disruptions in sales and fulfillment.
When you update your UPC to a new GS1 barcode in seller central, you must manually update the listing details. The old UPC section will not automatically update to reflect the new GS1 barcode. Ensure that you update the product information and barcode details in Seller Central to reflect the change and avoid any issues with your listings.
Leave a reply
Latest Blogs

What Is Amazon Automation, and Why Is It Contentious Subject?
.jpg)
How to Add Product on Amazon Seller Central in 2025?
.jpg)
.avif)
.svg)


.png)
.svg)


